How to knit gradients
In the last few years, gradients and fades have become increasingly popular. If you’re unfamiliar with gradient knits, they’re items that are worked in a series of different colours blended into one another at the edges. A fade is a type of gradient that goes from the darkest to the lightest colour, but in practice the terms are used interchangeably.
While there are some patterns that immediately come to mind when talking about gradients (Find Your Fade, anyone?), there are simple techniques you can use to incorporate them in almost any project you’re working on. Before you decide to start throwing fades into everything you knit, though, keep in mind that gradients look best on patterns with simple stitches like stockinette, garter or simple cables. If you try and layer them into heavily textured or intricate pieces, the colour change will stand out more than the stitch pattern and you’ll lose some of the detail of the stitches.
The easiest way to work a gradient into a piece is to use multicoloured/gradient yarn. The main downside is that gradient yarn tends to be more expensive than other yarns, especially if you’re buying hand dyed. It also means that if you’re using more than one skein of yarn in your piece, you have to be strategic about how the different gradients work together across the skeins.
If you’re looking to build your own gradients, you’ll want to make the colours look like they’re slowly melting into each other, as opposed to having a hard cutover like in colour blocking. The trick to a good gradient is two fold. First off, you want to arrange your colours so that the ones that are closest tonally are next to each other - purple fades into blue much better than it fades into yellow. Secondly, you want to use a knitting technique that creates a section in between two colours that are a mix of the two. So instead of having a purple section then a blue section, you have a purple section, a mixed purple/blue section, then a blue section. The relative sizes of the sections are up to you - if you have wide solid sections with smaller mixed ones it’ll look more like separate colours melting into each other, but if you have big mixed sections with small to no solid sections then it’ll look like one big continuous fade.
The way to make the mixed sections look like they’re melting is by using one of the following knitting techniques.
Knit some Stripes
The most straightforward way to mix your colours together is to alternate rows of the two colours you’re mixing. When you’re done with a solid section in one colour (let’s call it colour A), join the next colour (colour B) at the start of a new row. Work a round (if you’re working in the round) or two rows (if you’re working flat). Then switch back to colour A and repeat. This technique is especially effective on patterns like garter stitch that have purl bumps on the right side. When you’re happy with the size of your mixed section start working in only colour B.
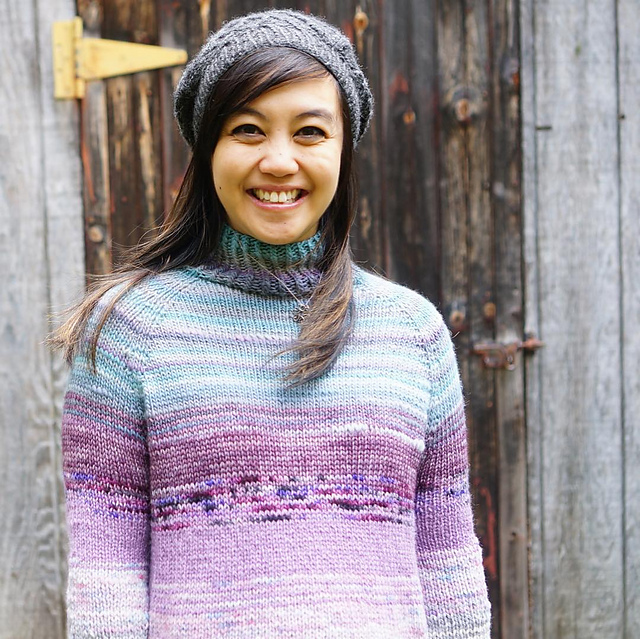
I used this technique on my Rhinebeck Sweater from last year (pictured above). The pattern was Turtle Dove from Espace Tricot which is worked almost entirely in stockinette, so it was a great project to add a gradient to. If you’re looking for a simple pattern to try out the technique, either the Seed Stitch Scarf or the Diagonal Striped Scarf would be a good project to start with.

Stripes and Slipped stitches
To make the colours look even more mixed together, you can work some slipped stitches into your stripes. When you slip a stitch, it stays the same colour as it was in the previous row. This means that when you’re working rows in different colours you end up with multiple colours in one row (without having to do stranded colourwork). A basic two-colour slipped stitch pattern for working in the round would look like this:
Round 1 (colour B): K all sts
Round 2 (colour A): *K1, sl1; repeat from * to end
Round 3 (colour A): K all sts
Round 4 (colour B): *K1, sl1; repeat from * to end
This will result in a pattern that looks like stockinette stitch. Slipping stitches can affect your row gauge though, and will also give you a different drape to regular stockinette. So if substituting this for stockinette I’d suggest using the slip stitch pattern across the whole piece (including the solid sections) for consistency, and only do it with patterns like scarves or cowls where the row gauge and drape aren’t too important. If you’re making a garment or something that needs to be a particular size, just use regular stripes as opposed to slipped stitch ones.
If you’d like to see this technique in action, it’s how the gradient is worked in my Cosy Sunday Fade blanket.
Marled knits
Marled knitting is the technique of holding two strands of different coloured yarn together. This is a simple and very effective way to get your colours to mix - simply hold two strands of colour A together for the solid section, one strand of colour A and one strand of colour B together for the mixed section, then two strands of colour B together for the next solid section. It does mean that you need a pattern that uses two strands of yarn held together, or you need to adapt a regular one stranded pattern to use two strands. If you’re adapting a regular pattern to be two stranded, the rule of thumb is to use a yarn that’s two weights smaller than the one the pattern calls for. So if the pattern calls for 8 ply (DK weight) yarn, try substituting two strands of 3 ply (fingering weight). Or if the pattern usually uses 10 ply (worsted weight), try substituting with two strands of 5 ply (sport weight). This is just a rough guide - make sure to swatch carefully to test out any substitutions you want to make. If you’re looking to try this technique out before adapting a pattern yourself, the Gradient Fade cowl from Tina Tse is a great place to start.
What’s your favourite gradient project? Or do you have a pattern in mind that you think would work well with a fade? I’d love to see your gradient work!